The Windows XP Error Song
Familiar to all Windows XP users (and haters!)
Familiar to all Windows XP users (and haters!)
First of all, I apologize for not posting for a long time. MTNL Broadband problems, you know very well 😀
Here is another method of formatting a USB Disk into NTFS, this time, using Windows XP’s native formatting. No external software required!
1] Plug in your pen drive, and open My Computer. I’m using a Kingston DataTraveller 100 16 GB (birthday gift for the 24th of December! Yee hah!)

The Start Menu
2] Now, locate the USB Drive. It’s KINGSTON (I:) for me. Right-Click, and choose Properties.

Right-Click Menu
3] In the Properties dialog box, click on the Hardware tab, and double-click your USB Drive. For me, it’s Kingston DataTraveller 2.0 USB Device.

Hardware Tab In The Properties Dialog Box
4] In the Kingston DataTraveler 2.0 USB Device Properties dialog box, I clicked on the Policies tab (that is what you should do too). You will notice, that the Optimize for Quick Removal Radio Button has been chosen by default. Choose the Optimize for Performance Radio Button and click OK. Click OK in the previously opened window too.

Policies Tab
5] Now, right-click on your USB Drive icon in My Computer and click Format.

The Format Option
6] In the Format menu, choose NTFS in the File System drop down menu. Check Quick Format and Enable Compression if you want. If you think you’re done, you are. There isn’t anything that can go wrong anyway. Hit the Start button and relax. You have an NTFS USB Disk now.

The Format Window
Note: I have noticed that enabling compression greatly affects the performance of Transcend USB Drives. The difference is not noticed much in Kingston drives. However, I cannot guarantee any data loss.
Merry Christmas, everyone! And a Happy Birthday to me!
So it all started when one of my friends wanted a copy of this Digit magazine DVD, which is Dual-Layer. I had Nero 9 make an image file onto his 16 GB Pen Drive, and it stopped after a quarter of an hour, claiming that no file larger than 4 GB was allowed, because it was a FAT partition. Now, I had this great burning desire building up inside me, to chuck the pen drive out of the window, but then I pledged not to rest until I had found the solution. So I set out on a search, and found this HP USB Disk Storage Format Tool. Its actually meant for completely formatting your USB disk, because Windows XP’s native formatting tool does not remove auotrun.inf viruses.
1] Download and install the HP USB Disk Storage Format Tool.
2] Connect your USB disk. Since I had given back the 16 GB pen drive to my firend, I tried this out on my own Transcend 2GB.
3] Open the application. Choose your USB disk from the “Device” drop down box at the top. If there is only one USB disk, it should be already chosen. I chose JetFlash TS2GJFV30 8.07 (1936 MB) (I:\). Big name for a small pen drive!
4] Open the “File System” drop down box and choose NTFS.

Change to NTFS
5] Now, check “Quick Format” and “Enable Compression”. Give a label if you want. If you’re sure you’ve enabled all the settings, click “Start”.

Settings
6] Now wait for a few seconds and your USB disk will now have an NTFS file system. This means you can store files larger than 4GB, and compression allows stuff to occupy lesser space on your disk, thus saving much needed space.
Although Windows Vista has a huge number of bugs, you will definitely agree that Windows Vista is much more superior in looks. Its complete eye candy. How about mixing the XP stability and Vista looks? A great combination. As the tutorial is huge, I will post it in parts.
This part will talk about adding the most important features of Vista, and also about giving XP the skin.
1] Download Vista Transformation Pack from here
2] Extract the file, and run it. Follow the instructions and install. Use express install instead of classic, it will save you time. Do not integrate files into the system files!
3] Restart the computer after installation. You now have an awesome desktop! Complete with sidebar. Whats missing is the transparency. Lets fix that too.
4] Download WindowBlinds from this .torrent file. You need a torrent client like µTorrent to download this.
5] Open the folder, navigate to Crack, and open “sid.txt”

SID
6] Copy the SID, and open “newsid.exe”. Click Next in the dialog box, and paste the new SID.

New SID
7] Click Next until the SID application process starts. It will take a long time, depending upon your installed applications. Do not touch you computer until asked to. To pass time, do what I did. Play PlayStation 2!
8] After the process is complete, you will have to restart the computer.
9] Now, install WindowBlinds given in the torrent file. After installation, you will be prompted to register. Close the dialog box, exit WindowBlinds, and navigate to the same Crack folder. Copy the Sig6.bin file and paste it in the WindowBlinds installation directory.
10] Now, open WindowBlinds. Tada! It’s successfully registered.
11] In the WindowBlinds application, select Aero Style by WIndows X and click Apply my changes

WindowBlinds
12] Wait for some time, and you should have a desktop looking like WIndows Vista along with the Start Menu and window and taskbar transparency.
You can play with WindowBlinds and change the opacity of elements.
So now you made the feel. Now you get the stuff.
13] Get the Windows Vista style explorer for XP. Download ViSplore from here.
14] Extract it, and look at this beauty.

ViSplore
15] Nice naa? Download WinFlip now for an awesome Aero style window flipper from here.
16] Extract and run the WinFlip.exe file. Hit WinKey+Tab for this.

WinFlip
In 16 steps, you made a Windows Vista style desktop. A mere 45 minutes for broadband users. An eternity for dial-up losers
While chatting with a friend of mine,  I stumbled upon this cool thing about the Xbox 360 – The Red Ring of Death.

Naturally, I was drawn to it and found out some really interesting stuff.
Just like the Blue Screen of Death [BSoD], Microsoft has gone a step forward and has incorporated another error screen – now in it’s console, the Xbox 360. It looks like this

Red Ring of Death
Instead of the green lights around the power button, you see a “red ring”, indicating that your Xbox 360 “has officially crashed”.
Now this is what everyone is talking about – how to cure this strange illness? The PLAYSTATION 3 has no such known major technical problems, but a major one for the Xbox has surfaced.
The cure is simple – it is called “the towel cure”.
1] At least four or more large towels
2] A RRoD affected Xbox 360
3] Patience 😉
1] Wrap the Xbox 360 with towels, so that every part of it is covered with towels. Leave no end uncovered.

Towels and an Xbox
2] Make sure the Xbox is plugged in. Turn on your Xbox 360.
3] Wait for 10-15 minutes [this is where the patience kicks in ;D]
4] Switch of your Xbox 360, and remove the towels completely.
5] You notice it’s really hot, so you wait for it to cool down. Maybe a couple of minutes should do,
6] Now, switch your Xbox 360 on. Working like a dream.
Alternatively, you can also watch a video tutorial
However, this is just a temporary patch. There is no guarantee that this will work forever. But hey, at least you fixed it without blowing up a few bucks. Save ’em for NFS Undercover.
This is a hot debate to talk about and here is an honest review/comparison between both of them. Let’s see who wins in the end. Here are the features for both of ’em.

Click for a bigger image
Obviously, as you can see, the PS3 is better than the Xbox in every respect. Power, processing, graphics, you name it. Even the average units sold per day is more than the Xbox. Considering the games released, all the Xbox games are war based – Gears of War, Halo 3, Bioshock. But the PS3 games have variety such as Afrika. Looking at the fact that the Xbox is 16 months older than the PS3, the titles should be even more exciting.
Even in the power supply, the Xbox has a huge and bulky brick, and the PS3 has an internal one, and only needs a cable.
The storage capacity is nearly 10-15 GB more than the Xbox, so that more detail can be added to it.
As noticed in the chart, you have to pay for everything in the Xbox – External HD-DVD Player, HDMI Cable, Internet Access, Wi-Fi adapter, etc. But in the PS3, you get everything for free. You only gotta pay a mere $44 for a Dualshock 3 Wireless Controller, to have vibration as well as Six-axis motion sensing, which the Xbox misses. That is one way in which the Xbox 360 triumphs over the PS3 – vibration. Sony claimed that it would interfere with the vibration.
The Xbox 360 has so many technical problems, that it is often referred to as a time bomb by many. It explodes due to overheating. But a core worth 3.2 GHz is left unused in the PS3 for just that – bearing overload and preventing a blast. The PS3 is also sturdy. I’ve heard about friends moving their PlayStation 3s from one place to another by air, and it worked perfectly. I’ve experienced the same with my PS2.
If I were you, I would buy a PS3. I wouldn’t mind spending extra money for some awesome features and superb glossy black look.

iPod

Zune
It’s been a long time since the Apple iPod Nano 4G and Microsoft Zune were out. The iPod Nano has been revamped for the fourth time in four years, but it does look damn cool. It sweet and light and sleek. I simply hated the fatty Nano which released previous year. The new Zune doesn’t look too bad. But which one to choose? Lets see the specs first:

iPod vs Zune
Well, that should be handy! Click for a bigger and clearer picture.
As far as the comparison is concerned, both of ’em have equally great features. The Zune has Wireless Connectivity, which allows you to download stuff over a Wi-Fi hot-spot, and this the iPod lacks. This enables a Zune owner to transfer stuff wirelessly to other Zunes, and sync wirelessly to computers. Apple has included this only in the iPod Touch.
Zune also allows you to download DRM free MP3s, which Apple doesn’t – limiting it’s playing to only five PCs or MACs
On the other hand, Zune misses cover-flow, an awesome feature to scroll through albums. Even the picture formats are more in the iPod. Zune also lacks the looks – it appears to be a big chunky brick. The iPod has nice tapering edges which make it look attractive. Apple offers free custom engraving, which is pretty cool.

Both have equal amounts of storage and battery life. Even the sound quality is flawless in both.
So in the battle, both have won. If you want to go for reliability, then go for the iPod, as Apple has dominated the music player market for years, and has a lot of experience to make these. However, if you want to feel different, go for the Zune. Its obviously rarer than the iPod, and will attract attention.
Strange, isn’t it, the roles being reversed? In the computer market, you get a Microsoft PC for reliability but a Mac for being different.
This isn’t really a hacking method, but it certainly gives the user a fright. Its a method to make a countdown timer, which shuts down the computer.
There are some DOS commands involved here. So let’s get familiar with those.
After typing shutdown you may place any of these attributes.
-s = Shutdown/Power-Off
-r = Restarts
-t = Sets a time limit for shutdown. Should only be used with -s or -l. Else, it leads to Logging Off, regardless of the time limit set
-c “xx” = Adds a comment to basically “explain reason” of shutdown. xx can be any message less than 127 characters and should always be in quotes.
-l = Log off account. Takes you back to the welcome page
-a = Cancels a system shutdown. Very handy to stop an intentionally or virally intitiated shutdown.
-f = Forces running applications to shutdown without warning (no Error Report messages!)
There! Now that you’re done, lets type the code.
1] Go to Start –> Run
2] Type shutdown and the appropriate code for desired behaviour. Here is an example…
Give the message “Your PC was hacked by the Devil…” and shutdown the computer after 80 seconds.
shutdown -s -c “Your PC was hacked by the Devil…” -t 80
The only way to stop this is by typing this in the Run dialog box:
shutdown -a
If you want, you may create a desktop shortcut with the above code as the target, to stop an initiated shutdown.
Yes, it’s official. After being declared as the biggest failure of 2007, the Windows Vista successor Win-doze 7 (also known as Vienna) will finally be rolled out by Microsoft sooner (or later, considering Microsoft’s Habit of making us wait for junk, like Wee-sta).
So here are some screenshot of the upcoming and …uhm… “Next-Generation” OS by Microsoft.


A lot of people want to know how to hack. Here I start a series called Hacking, which will give you small tips on how to hack.
Make a Batch File
1] Click Start. Then click Run. Alternatively, you can press WinKey+R, which is the shortcut for Run.

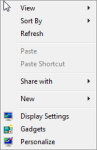
Click Start --> Run
2] In the Run dialog box, type “notepad” without the quotes, and hit enter.

Type "notepad"
3] In notepad, type
start x.bat
x.bat
Here, x can be anything – quake3, virus, phone, 42, etc. But remember to but .bat at the end, or the virus will not work.

Type it
4] Hit Ctrl+S (Save) and give the name as x.bat. Again, if you replaced x by anything else, the filename should also be changed.

Save
5] After saving, your virus looks like an innocent, visible file. A tiny icon of <1 KB. Even antivirus cannot detect it!

X

Scan

Selected My Documents Folder

No viruses!
6] Now to mask it to make it attractive, so that the user clicks on it. Let’s change the icon. Right-click and drag the file and once you leave the button, you will get a drop down menu. Click “Create Shortcuts Here”

Drag and click
7] Right-click the shortcut and click properties. Click Change Icon in the Properties window under Shortcut tab.

Shortcut Properties
8] Click OK on the error message and click an appropriate icon. Click OK twice. I chose Internet Explorer, as the user can easily be tricked into clicking on this.
Choose Icon
That’s it! You’ve made a virus! You can drop the shortcut anywhere on the user’s computer

